Crockpot

To Die For Crockpot Garlic & Brown Sugar Glazed Chicken

IMG_7218My roommate is absolutely adorable. Her birthday was last month and since we were on winter break, I didn’t get a chance to celebrate with her. So when the semester started, I told her that I would make her anything that she wanted. You name it, I make it so to speak.

“You know that super delicious chicken with garlic and brown sugar that you made last semester? Can I have that? If it’s not too hard.” *Adorable face*

I assured her that it was one of the easiest things ever and that I could absolutely deliver. I mean, it’s a crock pot meal for corn’s sake. Plus all four of us in my apartment got to benefit from such an excellent suggestion.

This chicken rocks. It’s one of those things you can’t really describe and it leaves you pretty speechless. I found this while perusing Pinterest. I adapted it from the recipe 0n the blog, Ciao Chow Bambina. However, I don’t know where the original recipe is from, since it seems to be everywhere on the internet.

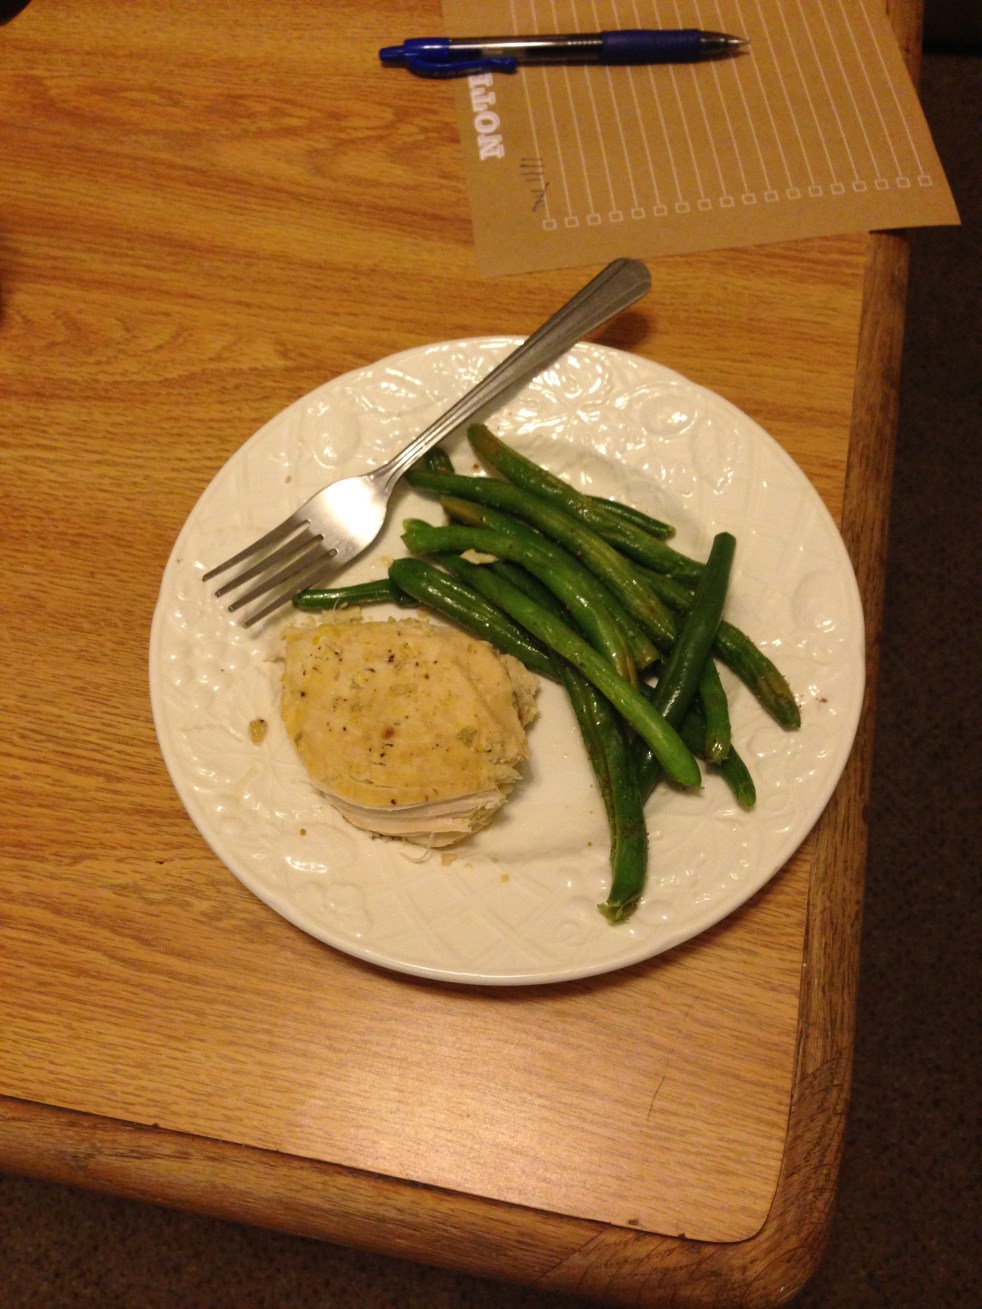
Anyways, it’s the bomb.com. It is super moist, flavorful chicken breast that can be eaten a million different ways and still end up delicious. We made it and served it with white rice on the side. You can also serve it on a sandwich like pulled chicken. MMMMMMM 🙂

Here it goes!

Crockpot Garlic and Brown Sugar Glaze Chicken

Adapted from: Ciao Chow Bambina

Cooking Time:6-8 hours

Ingredients

  • 2 lbs. boneless, skinless chicken breast
  • 1 cup of packed brown sugar
  • 2/3 cup apple-cider vinegar
  • 1/3 cup lemon-lime soda ( I used Sprite)
  • 3 Tbsp minced garlic
  • 2 Tbsp soy sauce
  • 2 tsp black pepper
  • 2 tsp red pepper flakes (optional)

Instructions

  1. Spray your crockpot with a cooking spray (like Pam) or grease well with butter.
  2. Put chicken inside crockpot.
  3. Mix together vinegar, soda, garlic, soy sauce, brown sugar, and black pepper.
  4. Pour the delicious sauce mixture over the chicken.
  5. Cook on low for 6-8 hours or on high (if you’re in a rush like me) for 4 hours until chicken falls apart.
  6. Remove chicken from crock pot and serve over rice, pasta, on bread, or by itself (it’s all amazing)

A side note: Since I am a *lazy* college student, the original recipe says to thicken the sauce at the end. As delicious as that would be, as the meme so eloquently puts it: Ain’t nobody got time for that! If you are possessed to go whole hog and thicken the sauce, you just throw the juice in a pan with cornstarch and bring to a boil. You then can put it on the chicken.

IMG_7219Hope you all enjoy! Happy Cooking!

Crockpot

Dormitory Chef’s Healthy Crockpot Orange Chicken

IMG_7176In my humble opinion, college can be the true definition of insanity. You have to juggle between 4 and 6 classes, plus hundreds of pages of reading, club commitments, and living situations. It would make anyone go nuts! My new semester started last week, which means that I started to get very lax about the food that I am consuming. It is much easier to make grilled cheese sandwiches and shove chips into your mouth (can anybody say SuperBowl?) than to actually take the time to create a healthy meal. I am the designated cook in our 4 person on-campus apartment. This semester, I am swimming in the evenings 4 days a week, which doesn’t leave much time in the way of food prep. Luckily, my cooking BFF, the crockpot, will help me out. Here is a recipe that I made for HEALTHY Orange Chicken in a Crockpot. It is super delicious and the chicken is left with a citrus flavor that tempts even the pickiest of taste buds.

Disclaimer!!!! This is not Chinese takeout (or Panda Express) Orange Chicken. This chicken is simply flavored with orange, not battered and fried. I also included the easy, yet delicious, recipe for the green beans that I made to accompany the chicken.

Without further ado, here is the recipe!

Dormitory Chef’s Healthy Crockpot Orange Chicken

Cooking time: 5-7 hours

Ingredients:

  • 4 boneless, skinless, chicken breasts
  • 3 Oranges, washed and sliced (not peeled)
  • Salt
  • Pepper
  • Garlic Powder
  • 1.5 cups of chicken broth or stock

Directions

  1. Season each chicken breast liberally with salt and pepper. Make sure to cover both sides of the chicken.
  2. Place seasoned breasts inside of crock pot.
  3. Sprinkle about a tablespoon of garlic powder over the chicken.
  4. Add 1.5 cups of chicken broth to the crockpot.
  5. Cover the chicken with the orange slices. IMG_7177
  6. Cook on low for 5-7 hours. 1 hour before serving, turn the crockpot on high.
  7. To make sure the chicken is cooked through, take out the largest piece and slice in half. If there is no pink and the juices are running clear, it is cooked!

And now for the side!

Dormitory Chef’s Easy Green Beans

Cooking time: 8-10 minutes

Ingredients

  • 1 lb of green beans
  • 1 tbs olive oil
  • Salt
  • Pepper
  • Garlic Powder
  • 1/4 cup of water

Directions

  1. Place washed green beans in a microwave-safe container with water.
  2. Microwave covered for 6-8 minutes until the doneness that you desire is achieved.
  3. RemoIMG_7178ve from microwave and drain excess water.
  4. Season with olive oil, salt, pepper, and garlic powder to taste.
  5. Serve!

I hope you all enjoyed this healthy meal! If you have any questions, please let me know!

Happy Cooking!

Crockpot

How to make up your own concoction: Pot Roast Edition

You know those times when you see a recipe on Pinterest that you REALLY want to make, and you then get really sad because you don’t have the ingredients? That happens to be the story of my life. Today, my mom told me that we had a chuck roast that needed to be cooked for dinner and she wanted to know if I had any ideas for how to cook it. Since my experience with pot roast hasn’t been the best (you can read all about that in my post about how awesome crock pots are), I was determined to find something amazing and different. My recipe best friend, Pinterest, gave me many delicious alternatives to pot roast. However, every one I clicked on had at least 2 ingredients that I lacked (cue the sad violin music).

In situations like these, it is easy to start pulling hair out over looking for alternative recipes to fulfill your needs. Believe me,  I’ve been there, and it soon becomes impossible to find something that perfectly matches the ingredients you have in your pantry.

So, the best thing to do is simply to improvise. Which is how this recipe came into existence. I grabbed things that I knew would be delicious and made a meal that surprisingly came out finger-licking good.

Disclaimer on this: This is a guesstimating recipe. There are hardly any solid measurements, and there really doesn’t need to be. Part of cooking in any setting, even in a college one, is experimenting. I made it so that you could follow the recipe without needing measurements. It is also very versatile. We made it into sandwiches and put the sauce over the meat, but you could also serve it over rice or pasta.

So here goes nothing!

Dormitory Chef’s Italian Pot Roast 

Cooking Time: 9 hours (in a crockpot)

Total Time: 9.5 hours

Ingredients for the Roast

  • 3-4 pound chuck roast (boneless or otherwise)
  • Olive Oil
  • Garlic Powder
  • Salt
  • Pepper
  • Onion Powder
  • 1 packet Good Seasons Italian Dressing Mix
  • 1 medium yellow onion
  • 1 can whole tomatoes

Directions

  1. Place chuck roast in crock pot
  2. Rub olive oil (about a quarter cup) into the roast. Season liberally with salt, pepper, onion powder, garlic powder, and Italian dressing packet. The key to a successful meal is in the seasoning, so don’t be shy. Rub into the meat on both sides. IMG_7111
  3. Cut onion into thin slices
  4. Place onions over roast IMG_7113
  5. Add tomatoes over the onions IMG_7114
  6. Cook on low for 9 hours until the meat is cooked through
  7. Remove the meat from the pot and shredIMG_7116
  8. Serve any way you want! We shredded the meat and made open faced sandwiches! IMG_7122

Hope you all enjoy! Happy cooking! If you have any questions, please don’t hesitate to ask!

Breakfast

Magical Puff Pancake Recipe!

Now you’re probably reading the title of this post and are thinking: hmm what’s so “magical” about a pancake that puffs? Well dear reader, my answer to that is: EVERYTHING. It is the most delicious (and easy) breakfast thing ever (Besides the cream cheese cinnamon rolls). It tastes like a pancake, but it is eggy and has a crispy exterior that can’t be beat.

If we are being extremely honest with one another, this recipe is from a kid’s cookbook. Back in the days where I still had eggshells in my baked goods from the failed egg cracking attempts, my mom bought me a Pampered Chef cookbook called Let’s Eat! To be even more honest, this is the only recipe I have ever made from that cookbook, but it is a complete winner. Whenever I am home from school on break, my 18 year old brother still requests for me to make this for him for breakfast. It’s that good.

So lets get started shall we?

Magical Pancake Puff

  • Adapted from: Let’s Eat!
  • Baking time: 20 minutes
  • Total time: 25 minutes

Ingredients

  • 2 tablespoons butter
  • 3 eggs
  • 1/2 cup milk
  • 1/2 all-purpose flour
  • 1/2 teaspoon salt
  • 1/4 teaspoon vanilla EXTRACT

Directions

  1. Preheat the oven to 425 degrees
  2. Melt the butter in a microwave-safe dish for30-45 seconds until melted
  3. Add ingredients to the butter IMG_7095
  4. Whisk the ingredients with a whisk (duh) or a fork
  5. Pour the batter into a greased round plate (you can use either a cake plan, pie plate, or whatever you have available to you. Trust me, it still works) IMG_7097
  6. Place that pan in the oven IMG_7098
  7. Bake in oven for 19-20 minutes until sufficiently puffed and golden brown. You will know when it is done. IMG_7099
  8. Take out of the oven and revel in it’s magical gloryIMG_7100
  9. Enjoy with maple syrup or powdered sugar. Or both 😉

That’s all she wrote ladies and gents! Enjoy!

Happy Cooking!

Crockpot

Why Crock Pots aren’t just for moms and grandmas anymore

Crock pots are one of those things that a lot of us dreaded as a kid. I don’t know about you, but whenever my mom took the crock pot out, it was usually for pot roast. If you’re like me, this may bring back memories of flavorful meat that ended up dry most of the time because of the long cooking time.  Not the best thing in the world.

Then why am I saying these cooking vessels aren’t just for your mom or grandma? Because, dear reader, these cooking devices can actually make delicious food that isn’t dry. It can also make food that isn’t in the same realm as pot roast, like Mac and Cheese (are you drooling? Me too).

I got my crock pot from my Italian grandmother. She and my Grampa traveled all 50 states in a trailer and she had a set of everything in there. I’m talking a whole different set of dishes, silverware, pots, pans, bowls, and other miscellaneous stuff. Needless to say, I received a majority of my cooking supplies from the trailer stash, including the crock pot. The conversation with my Non went as such:

“Have you thought of what supplies you need for your kitchen?”

“Well Non, I think I need a rice cooker maybe? and some pans and cooking utensils.”

“Look in the trailer.”

“… Non you have a rice cooker in the trailer?”

“Yup. And a crockpot. Shop in the trailer.”

So to be honest, I didn’t really purchase new supplies to cook with. I “shopped” in my Italian grandmother’s trailer and got some pretty cool stuff. Including a crock pot.

Now my crock pot isn’t as fancy as the ones you can get today. It doesn’t have cool buttons, it has a dial with three settings: off, low, and high. But it works. You can also get a crock pot without breaking the bank, unless you too have a grandmother with an extra one lying around. Most crockpots can be purchased at your local Target or Walmart for under 40 dollars, and they last for a VERY long time.

It is now literally my favorite cooking device. All you do is throw stuff in there and turn it on. Then, when it is time to eat dinner, your meal is magically complete. Next to no prep, an easy amount of cleanup, and most of the ingredients are pantry staples. I can’t tell you how convenient it is to put ingredients in the pot at noon, go to class, and come back at 6 or 7 and have dinner ready. Plus, a majority of the recipes make for really delicious food.

I will be posting my favorites as I make them to the blog. So that you too can make some pretty killer food without a ridiculous amount of effort. Because, let’s be real: ain’t nobody got time for that.

Happy Cooking! If you have any questions, feel free to ask.

Breakfast

Easy Peasy Cottage Cheese Cinnamon Rolls

You read the title. Yes, these Cinnamon Rolls do have cottage cheese in them. But don’t fret, they are completely delicious.

I found the original recipe for these cinnamon rolls in the cookbook Teens Cook by Megan Carle. I discovered this book written by teens, for teens when I was 14. This recipe has been tweaked and adjusted to my liking, and is still a staple in my dorm apartment today.

Now I know what word is coming to your mind right now when you think homemade cinnamon rolls: yeast. But wait a second here dear reader, I’ll let you in on a little secret: there is no yeast in these rolls. Making these cinnamon rolls during finals week or when you have serious cravings has never been easier. All you need is a blender, a bowl, and a pan to throw in the oven. I kid you not, it’s that easy.

One quick side note before we move on to the recipe: these aren’t your Cinnabon cinnamon rolls that disintegrate in your mouth and are three-quarters gooey and covered with a million calories in icing. These rolls are dense and hearty like bread to keep you full and don’t have an icing. You don’t need one!

Now, lets get this party started!

Cottage Cheese Cinnamon rolls 

  • Adapted from Teens Cook
  • Baking time: 35-40 mins
  • Total time: 1 hour

Ingredients

  • Dough
    • 1 cup cottage cheese
    • 3/4 cup white sugar
    • 2 eggs
    • 1/2 cup oil
    • 1/2 cup milk
    • 2 tablespoons baking powder
    • 4 1/4 cups flour (plus more for dusting)
  • Filling
    • 2 cups packed brown sugar
    • 1 1/2-2 tablespoons cinnamon
    • 1/2 cup butter
    • 1/2 cup honey

IMG_7045-2Directions

  1. Preheat oven to 325 degrees.
  2. Grease a 9 x 13 inch baking pan ( or something of similar size, remember this is easy).
  3. Put the cottage cheese in a blender and blend until the lumps are gone. Add the sugar, eggs, oil, and milk and blend until things are smooth.
  4. Pour the mixture into a large bowl and add the baking powder. Stir to combine.
  5. Add the flour a little bit of a time (in about 1/2 cup increments) until the dough is smooth. This part gets a little messy. I find it easiest to work it in with my hands and knead it while adding the flour until the dough stops gluing itself to my hands.
  6. Flour a table, or a kitchen countertop, and stretch the dough out until it is a large rectangle that is about 20 by 25 inches. Extra points if you actually use a rolling pin.
  7. Next, prepare the filling. Mix the brown sugar and cinnamon in a bowl. Depending on your liking of cinnamon, you can taste the mixture and adjust accordingly.
  8. Melt the butter in a microwave. Brush the melted butter over the stretched out dough.
  9. Drizzle honey over the butter. Try not to lick your fingers.
  10. Sprinkle the sugar mixture over the calorie-laden goodness, I mean honey and butter. Try to fill in as much of the dough as possible.
  11. Roll the dough up as tightly as possible.
  12. Using a knife, preferably serrated, cut the roll into 1 to 1 1/2 inch slices and place into the greased pan.
  13. Put the rolls into the preheated oven and let them cook for 35 to 40 minutes. The tops should get a nice golden brown color and if you pull up on the center of the roll, it should separate and not pull.
  14. Serve warm straight out of the oven. Store leftovers in the refrigerator.

One more thing: these babies taste great reheated in the microwave. Just pop them in for 45 seconds to a minute and get ready to relive the cinnamon goodness.

Enjoy and Happy Cooking!

Good to Know

Spices that EVERY kitchen needs

Variety is the spice of life, or so they say.

For your typical college student on a budget, however, a plethora of spices from all over the world may not be economical, for both your wallet and your cabinet space.

But alas, don’t fret dear reader! There is a way to get a whole lot of bang for your buck by buying certain spices that will jazz up any meal. In addition to that, they happen to be in my opinion, absolute essentials.

Continue reading “Spices that EVERY kitchen needs”